
Install and configure Active directory in Server 2019: Server 2019 is officially available from October 2018. How the creation of new domain controller in server 209 is different from previous versions of windows servers? Let’s create a new domain with the 2019 server in our test environment. Download windows 2019 server from this official download link:
Click here to download windows server evaluation version ISO\VHD.
Server 2019 is also available now in Azure Marketplace, VLSC and Visual studio subscriptions to download.
Also Read: Install Active Directory with PowerShell in Server 2019
Also Read: Install ADC in server 2019 step by step
-
Planning for new domain creation
Prepare the server for new domain with suitable hostname for the server, set static IP for the server and also set the complex password for local administrator account.
- Add ADDS roles and Features. Install ADDS role and RSAT features from Server manager -> Dashboard->Add roles and features‘ . Click ‘Next’ to proceed.

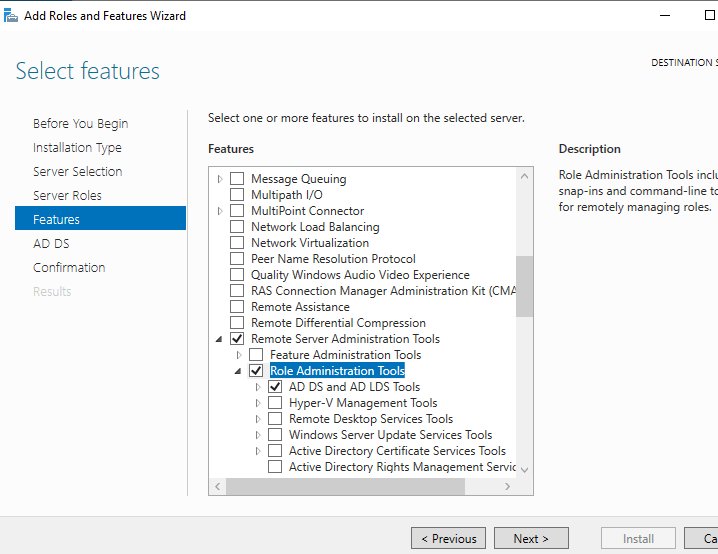
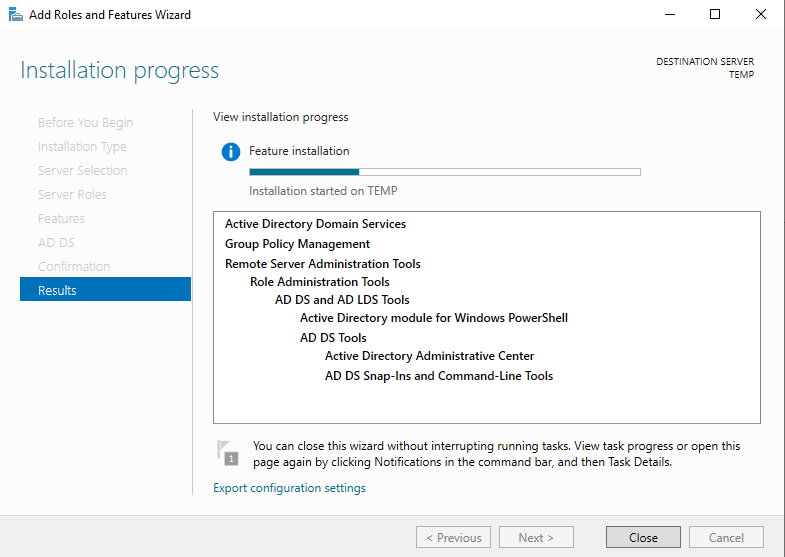
- Select ‘Active Directory Domain services’ Role. The wizard will automatically picks it dependent features and click ‘Add features’ in the Pop-up wizard. Click ‘Next’ to proceed.Make sure the following Features are marked for installation and click Next.Installation progress may take few minutes and completion of the progress can be verified on the Dashboard of Server Manger.
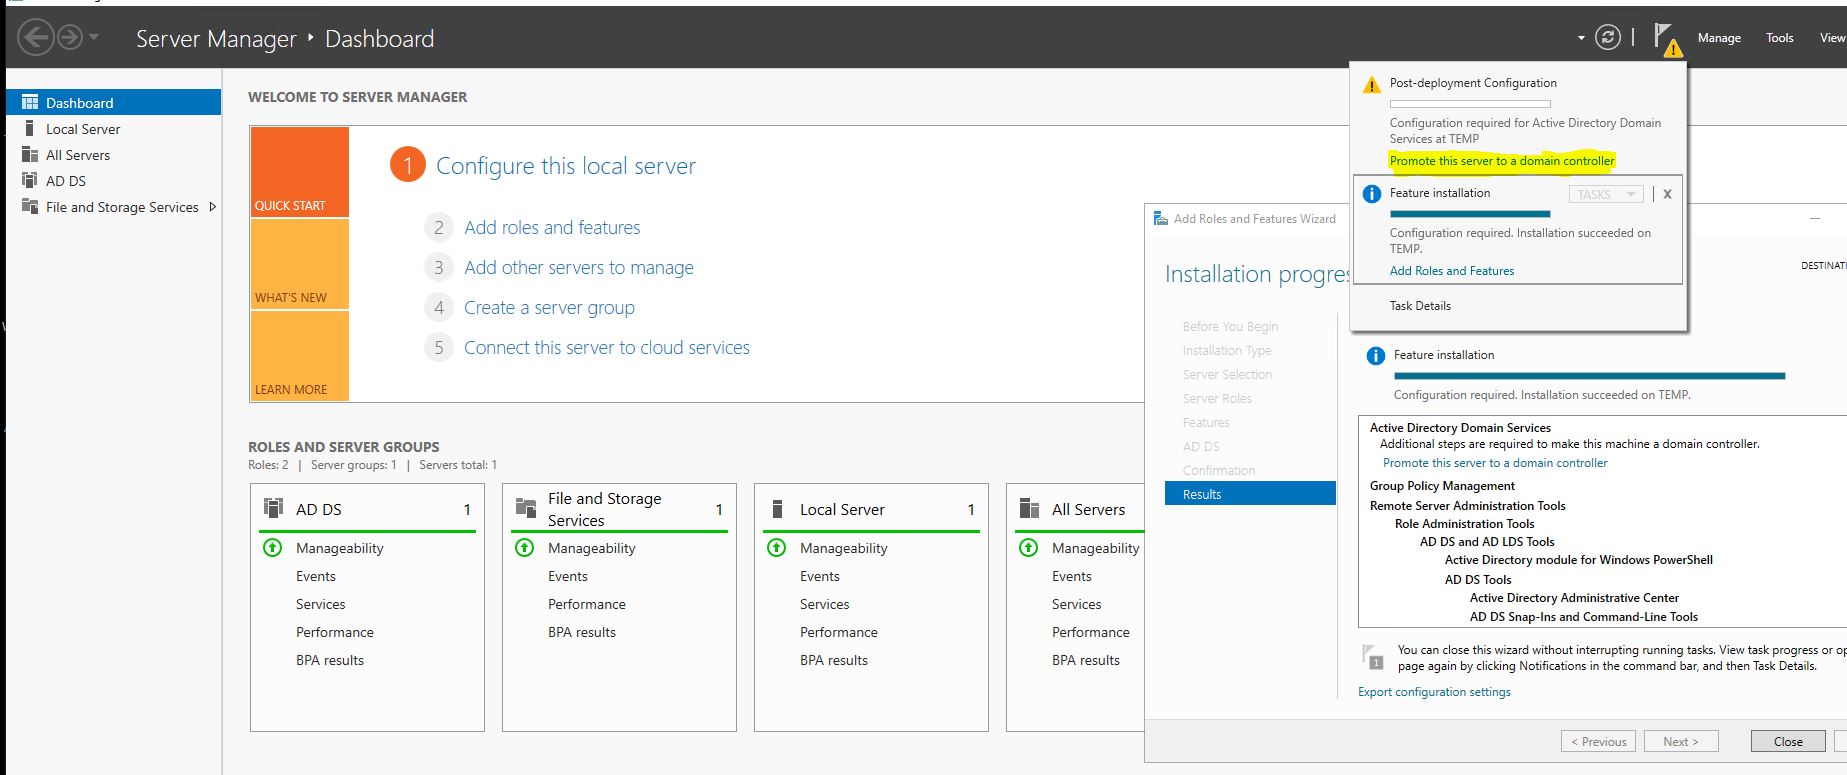
- Post-Deployment configuration: Next step is to promote the server as Domain controller. Click on ‘Promote this Server to Domain controller’ available under Server manager -> Dashboard -> Notification. It will open ADDS configuration wizard for configuration.
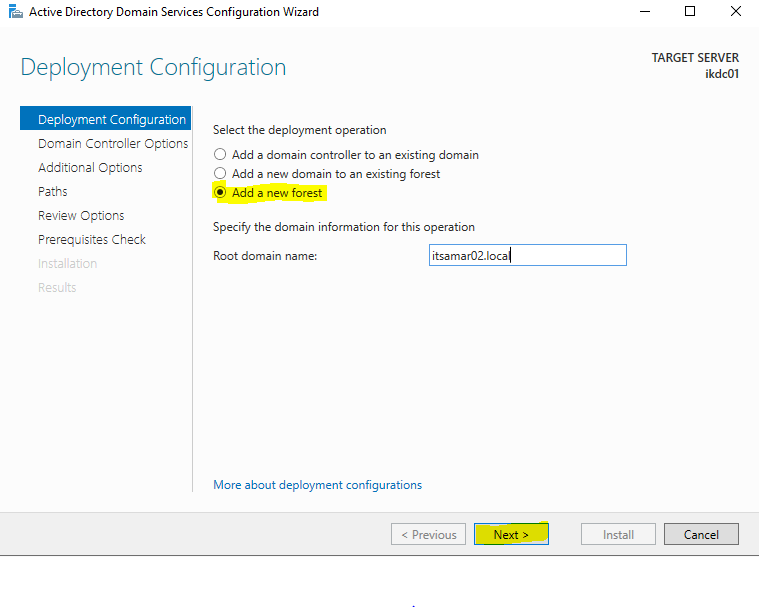
- Active Directory Domain Service Configuration Wizard : As we are creating new domain controller for our new domain, select ‘Add a new forest‘ and provide a domain name.
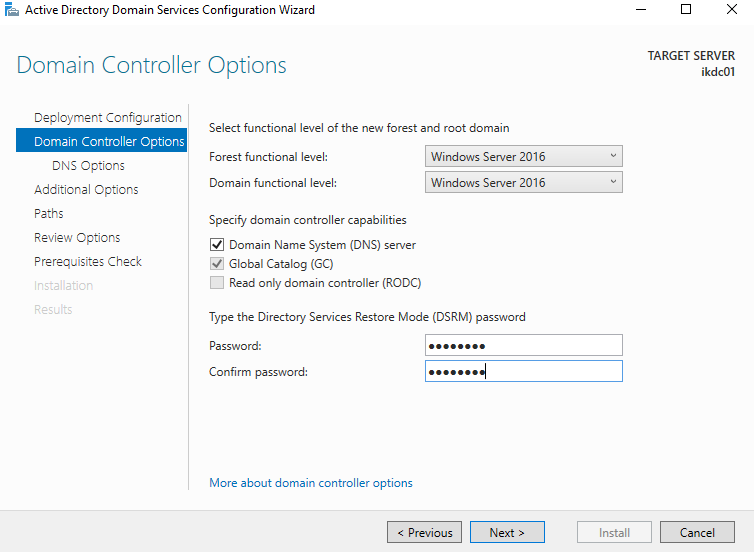
- Select the Forest functional level & Domain functional level. Both the forest & domain functional level can only be upgraded and cannot be downgraded. Also provide the DSRM password which will be required in repair\recovery mode.
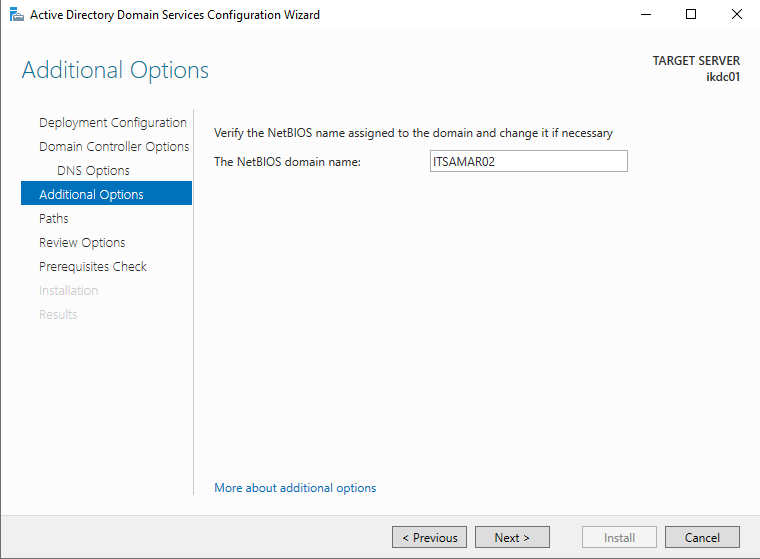
- Verify the netbios name of our domain and customize it if required.
- Default AD paths are C:\windows\NTDS and C:\windows\SYSVOL.
- NTDS (NT Directory Service) contains NTDS.dit (AD database), EDB.log, EDB.chk, Temp.edb, Res1.log & Res2.log
- SYSVOL (SYStem VOLume) is a shared directory with set public files and folders. Each domain controllers in the domain and network clients access the sysvol. Sysvol data includes Group policy,Login scripts,staging folders.
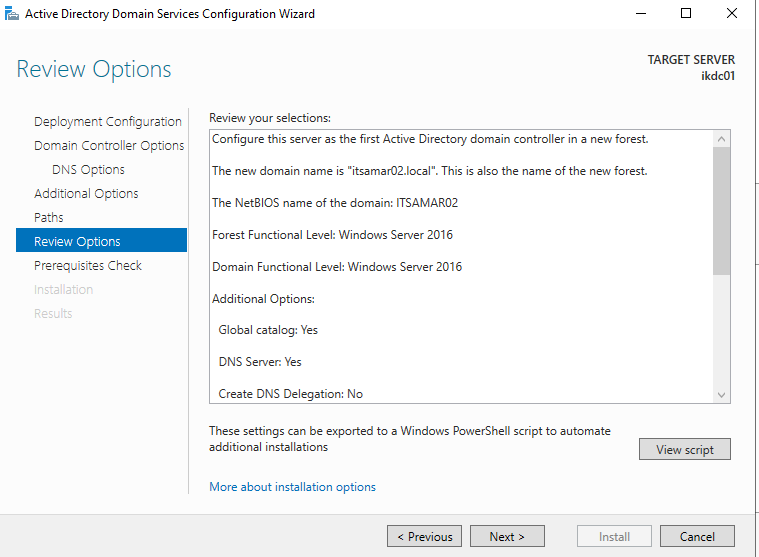
- In the ‘Review options’ , we can verify our configuration prior to implementation and make a correction if required.
- ADDS wizard will ‘Run prequisites check’ with our provided value. After the successful validation, click NEXT to begin the installation.


Kindly note that the server will restart automatically during the installation.


- On successful installation, the server will automatically reboots and the server becomes a domain controller.
Active Directory users and computers – Start -> Run-> Dsa.msc
Active Directory Administrative Center – Start -> Run -> Dsac.msc

[…] Also read : Install and configure Active directory in Server 2019 step by step […]