Install ADC with IFM in server 2019 step by step : During the installation of new additional domain controller, the server will copy the AD database and registry settings from the available domain controller. This initial replication will take lot of time if we are deploying it via WAN link for branch office and also in multi domain forest. IFM (Install From Media) is a coolest feature available to overcome such scenarios. AD installation with IFM uses the files downloaded from primary domain controller for the initial replication.
NTDSUTIL helps in downloading AD database & registry settings as IFM media file in the existing domain controllers to local folders or removable media. Downloaded IFM media should be available in new server during the promotion of domain controller. IFM helps in reducing WAN traffic and minimize the time taken during the promotion of new ADC.

There are two major steps involved during the installation based on IFM.
- Create IFM media from existing domain controller using ntdsutil .
- Copy the IFM files to new server and promoting the server using IFM.
A.Creating IFM media from existing domain controller.
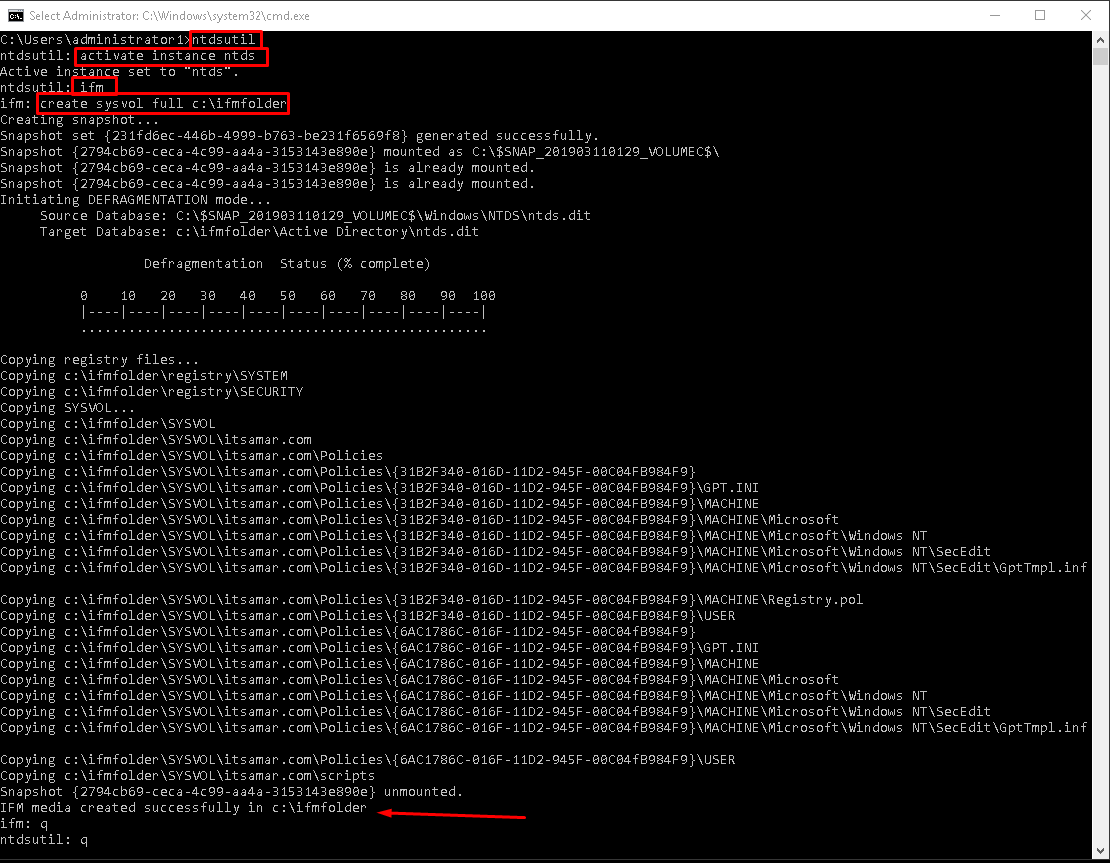
- 1.Open command prompt with administrative privilege in source DC and type ntdsutil to launch NTDSUTIL. Type ‘activate instance ntds‘ and Enter.
- Type ‘ifm‘ and Enter
- To create media for a writable DC, type create full <path>
To create media for an RODC, type create rodc <path>
To create media with SYSVOL for a writable DC, type create sysvol full <path>
To create media with SYSVOL for an RODC, type create sysvol rodc <path> - Media will be created successfully in the mentioned path. Verify the folder in the path containing 3 sub folders – ‘Active Directory’, ‘registry’ and ‘sysvol’.

B.Copy the IFM files to new server and promoting the server using IFM.
- Copy the IFM media to the new server.
- Join the server to domain and install ADDS roles and features. Launch ADDS configuration wizard and select ‘Add a domain controller to an existing domain’ and click ‘Next’. Enter DSRM password and click ‘Next’.
- Select ‘Install From Media’ option and provide the path of the media. Verify the file and click ‘Next’ to follow regular procedure of promoting the server as domain controller. Refer https://amar365.com/2019/03/07/install-adc-in-server-2019-step-by-step/ for step by step instructions on installing ADC.Verifying the installation of AD DS
- Logon to the Domain Controller hosting DNS.
- Launch the DNS console and verify the creation of Service Records for the newly established domain controller.
- IFM file should be exported from domain controller of same domain.
- To promote the server with AD-DNS, IFM file should also be downloaded from domain controller with AD-DNS.
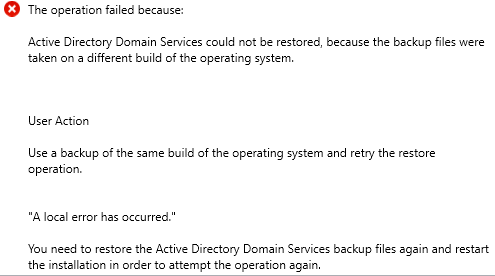
- Source and destination server build version needs to be same.